The record for maintaining a front hold currently stands at over nine hours, a testament to the power of isometric tension. Despite this impressive benchmark, many practitioners struggle to maintain a stable abdominal bridge for even sixty seconds without their form collapsing. This difficulty often stems from a lack of focus on the deep stabilizers, leading to ineffective sessions or unnecessary physical strain.
This article provides a detailed analysis of the plank to help you master its mechanics and optimize your core strength. We will examine the correct technical alignment and the most effective progressions to ensure long term progress.
- The Plank Exercise as a Foundation for Core Stability
- 3 Primary Muscle Groups Targeted by the Hold
- How to Perform a Perfect Plank Step-by-Step?
- Common Technical Errors That Ruin Your Progress
- 3 Progression Levels From Beginner to Advanced
- Health Benefits and Long-Term Safety Protocols
The Plank Exercise as a Foundation for Core Stability
The plank exercise strengthens the abdominals, back, and glutes simultaneously through an isometric contraction. Maintaining a straight head-to-toe line for 10 to 30 seconds optimizes spinal stability without joint risk, surpassing traditional crunches.
Transition: This efficiency rests on the very nature of the posture, often described as an isometric bridge for the torso.
The plank, also known as the “front hold,” “hover,” or “abdominal bridge,” is an isometric core strength exercise. It involves maintaining a position similar to a push-up to engage deep trunk muscles.
Defining the Isometric Core Bridge
The plank functions as a static bridge for the human frame. This position zero mechanics requires a full-body hold with absolutely no movement. Such stillness creates a solid foundation for all other athletic patterns. It is pure structural work.
The mechanics involve a deep isometric contraction. Muscle fibers fire intensely without actually changing their length. This process builds significant endurance and strength. It achieves these results without putting unnecessary stress on the joints themselves during the hold.
It is a pure tension exercise. No equipment is ever needed.
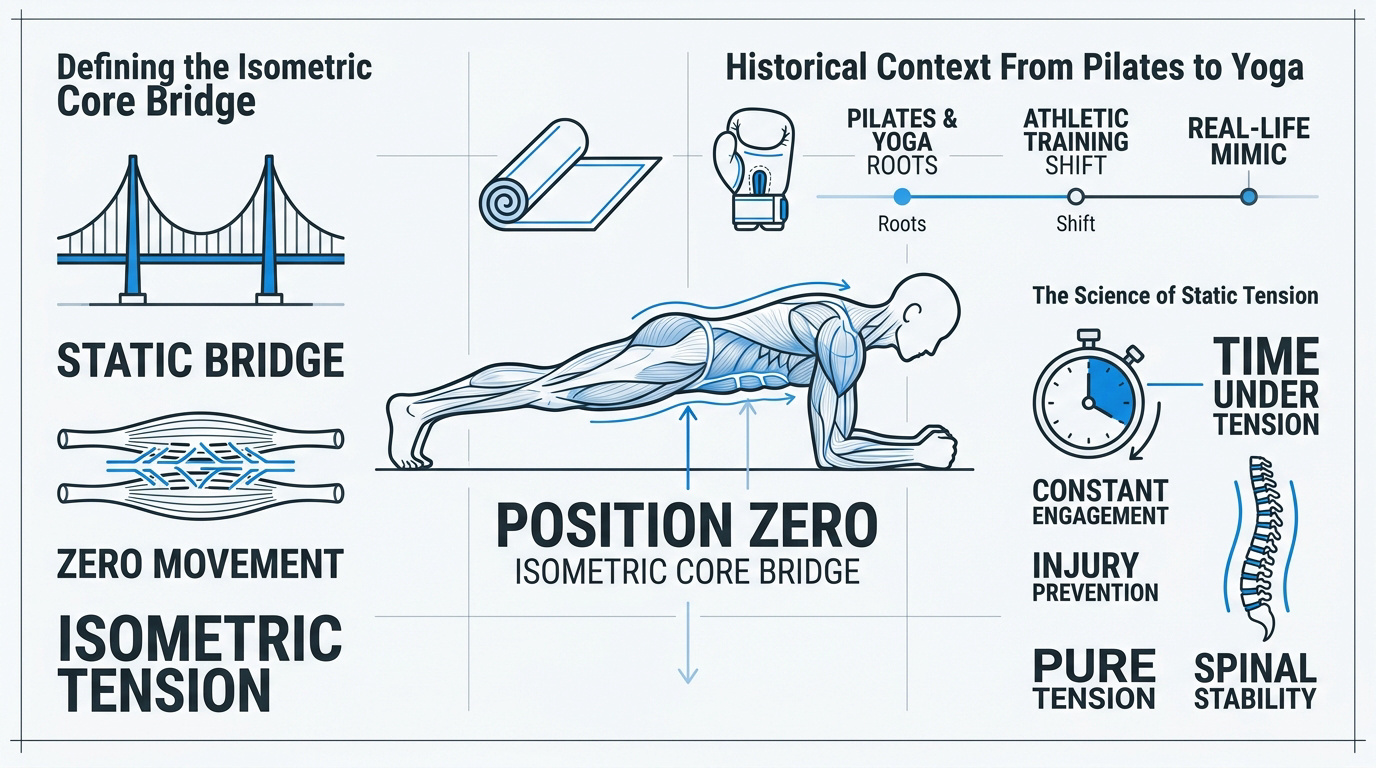
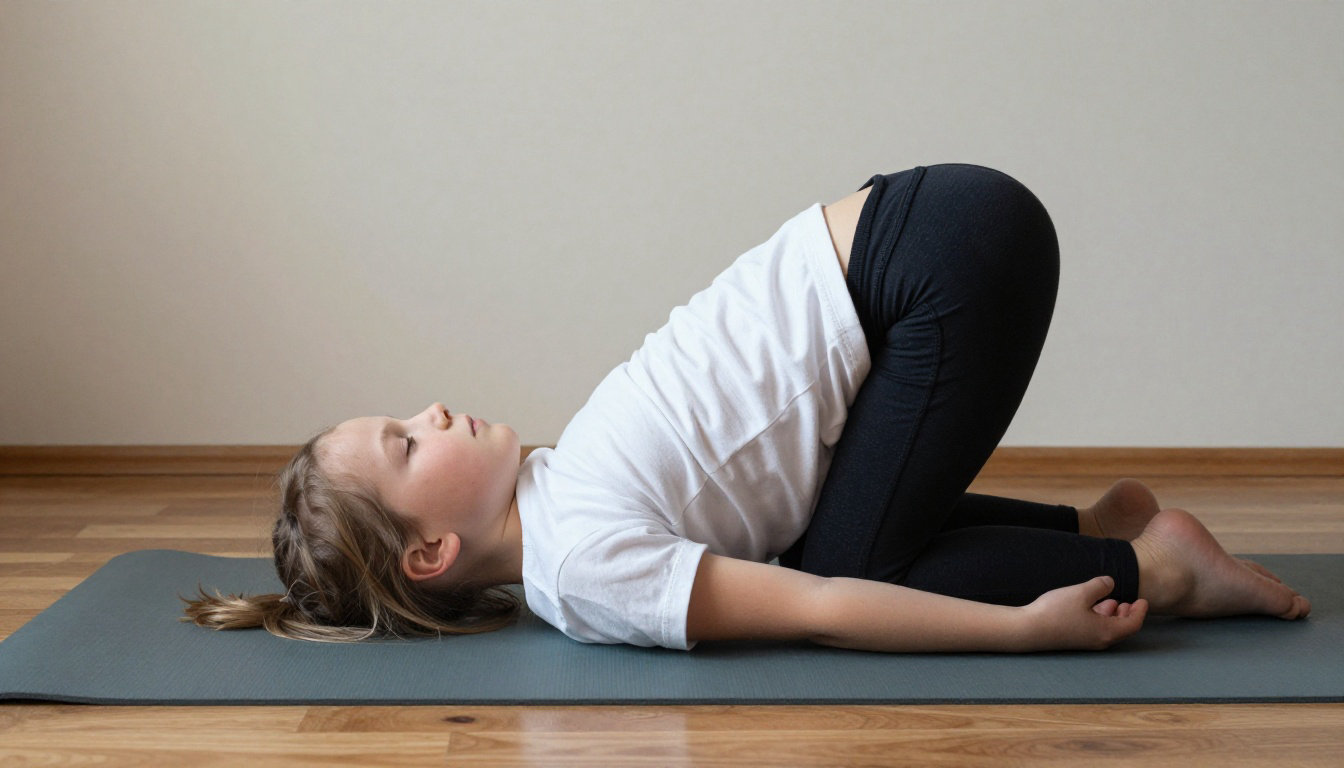
Historical Context From Pilates to Yoga
This specific hold traces its roots back to Pilates and Yoga traditions. Ancient practices focus on total body control. You might explore Yoga Mudras: The Secrets of Sacred Gestures for Energy for more historical context on energy and body mastery.
Boxing and athletic training eventually adopted the hold for durability. Coaches moved away from dynamic crunches toward static holds. They realized that stability was more important than repetitive flexing. This evolution changed how we approach modern core training today.
Static work mimics real life. We often hold heavy objects still.
- Josef Šálek (Czech Republic): 9 hours, 38 mins, 47 secs (May 2023)
- DonnaJean Wilde (Canada): 4 hours, 30 mins, 11 secs (March 2024)
The Science of Static Tension
Time under tension is the driving force behind this exercise. The muscles must work against gravity for the entire duration. This constant engagement builds functional strength. Such stability carries over directly into the movements of daily life.
Spinal stability is vital for long-term health. A stable spine prevents injury during heavy lifting or reaching. This relates to understanding neurasthenia and its impact on modern health by reducing overall physical strain on the nervous system.
Tension is the key here. Hold the line at all costs.
3 Primary Muscle Groups Targeted by the Hold
While the plank looks like a simple hold, it actually ignites a complex network of muscles across the entire body. Transitioning from a basic static posture to a full-body engagement requires understanding how these specific muscle groups interact to maintain the bridge structure.
Isometric exercises like the plank are more effective for reducing blood pressure than other types of exercise. It is widely used in physiotherapy for lumbar pain prevention.
Deep Core and the Transversus Abdominis
The transversus abdominis acts as the body’s internal corset. It braces the spine from within. This muscle is vital for total trunk stability. It works harder than the visible six-pack during a plank.
The rectus abdominis and obliques prevent the torso from twisting or collapsing. They provide the necessary tension to keep the midsection rigid. The primary abdominal muscles involved include:
- Rectus abdominis
- External obliques
- Internal obliques
- Transversus abdominis
The hold creates significant internal pressure. This intra-abdominal pressure acts as a shield. It protects the lumbar spine from unnecessary shearing forces during movement. This mechanism is essential for long-term spinal health.
Posterior Support and the Gluteal Complex
The glutes and erector spinae function as critical stabilizers. They prevent the lower back from arching too much. Strong glutes are the secret to a flat profile. They anchor the pelvis in place throughout the duration.

The hamstrings assist in maintaining hip extension. Without them, the legs would sag toward the floor. This ruins the bridge. They work in tandem with the lower body to ensure a straight line.
A clear synergy exists between the back and hips. This posterior chain engagement is vital. It balances the tension from the front of the body. This balance prevents common injuries associated with core training.
Shoulder Girdle and Upper Body Stability
The serratus anterior and deltoids push the floor away to keep the chest high. This prevents the shoulder blades from “winging.” It creates a solid upper foundation. This protraction is key for a stable plank.
The trapezius and rhomboids stabilize the upper back. They control the shoulder blades to maintain a neutral spine. This is similar to the upper body control needed for mastering the scorpion pose: technique and benefits.
The pectoral muscles contribute to the bridge structure. These chest muscles help maintain the upper body’s elevation. They work with the arms to distribute weight evenly. This prevents premature shoulder fatigue during the hold.
How to Perform a Perfect Plank Step-by-Step?
Adopting a precise technique is far more valuable than simply chasing a long duration. This progression ensures every muscle group contributes to a stable and effective hold.
Setting the Foundation With Forearms and Toes
Align elbows directly under shoulders. Keep your forearms parallel on the mat.
Place your feet hip-width apart for better balance. Press through the toes to engage the legs. This creates a stable base for the entire hold.
Maintain a straight line from head to heels. Proper alignment is vital, as noted in Harvard Health advice on planking form. This prevents unnecessary strain on the joints.
The Abdominal Drawing-In Maneuver
Imagine pulling your navel toward your spine. This isn’t just sucking in your stomach. It is a deep, functional bracing of the trunk.
Think about lifting from the bottom up. This creates a “canister” of stability. It is essential for protecting the internal organs and spine.
Keep the tension high. Do not let the belly drop.
Maintaining the Neutral Spine
A neutral spine position reduces pressure on the intervertebral discs. This is the safest way to load the core. Avoid any rounding or excessive arching.
Keep the chin tucked slightly. The gaze should be down at the floor. This maintains the natural curve of the neck throughout the set.
Your body is a straight board. Maintain that rigid line.
Breathing Patterns for Core Endurance
Outline rhythmic breathing. Do not hold your breath. This can spike your blood pressure. Take shallow, controlled breaths through the nose and mouth while keeping the core tight.
Consulting Nadi Shodhana Pranayama: Purifying the Energy Channels highlights the importance of breath control. Proper oxygen flow prevents premature muscle fatigue. It allows for longer, more effective sets.
Exhale during the hardest parts. Keep the rhythm steady.
Common Technical Errors That Ruin Your Progress
Even small alignment mistakes can shift the load from your muscles to your joints, potentially causing the very pain you are trying to prevent.
Fixing the Arched Back and Sagging Hips
Lumbar hyperextension is a frequent issue. This happens when the core stops working. The lower back takes all the weight. It is a common cause of pain after a workout. Always reset if you feel this.
Sagging hips shift the load dangerously. The spine loses its support. In fact, Prithvi Mudra: The Sacred Gesture for Your Grounding can help focus on stability and alignment. Proper grounding is key.
You must actively reset the pelvis. Squeeze your glutes hard. Imagine tucking your tailbone between your legs. This slight posterior tilt brings the spine back into a safe, neutral position.
Managing Neck Alignment and Gaze
Correct head positioning is often overlooked. Looking up strains the cervical spine. It breaks the kinetic chain from the neck down. This can lead to headaches or neck stiffness. Keep your neck long and relaxed.
I recommend adopting a neutral gaze. Look at a spot between your hands. This ensures the head stays in line with the shoulders. It is the most efficient position for your plank.
| Error | Consequence | Correction |
|---|---|---|
| Sagging hips | Spinal misalignment and strain | Lift hips and engage glutes |
| Arched back | Lumbar pain and core disengagement | Tuck tailbone and pull navel in |
| Looking up | Cervical spine compression | Gaze at a spot between hands |
| Holding breath | Increased blood pressure and tension | Maintain steady, rhythmic breathing |
Recognizing the Threshold of Fatigue
Identify physiological signs of failure early. Extreme trembling is the first warning. It means the nervous system is struggling. This is when form usually breaks. Listen to these signals to avoid injury.
Extreme trembling is the first sign of nervous system struggle. Stop the set when form breaks to avoid shifting load to joints.
There is a danger in pushing too far. Broken form does not build strength. It only builds bad habits. Quality always matters more than the clock. Stop before the technique fails.
Trembling significantly affects muscle recruitment. Small stabilizer muscles stop firing correctly. The body starts using “cheat” muscles to stay up. This reduces the effectiveness of the entire exercise. Focus on precision instead.

3 Progression Levels From Beginner to Advanced
Once you can hold a standard plank for 60 seconds with ease, it is time to increase the challenge to keep your muscles adapting. Moving beyond the basics ensures continued strength gains and prevents plateaus in your core stability journey.
Modifications for Limited Mobility and Seniors
Provide modified knee-based variations for a safer start. This reduces the weight the core must support during the hold. It is perfect for beginners or seniors. Keep the same straight line from head to knees. It is still very effective.
Use elevated surfaces to decrease the intensity. A bench or a wall reduces the angle of gravity. This makes the hold much easier to manage. You might consider managing your breathing difficulties: causes and solutions for those with limited capacity.
Detail safety for osteoporosis to prevent injury. Avoid high-impact movements that stress the spine. The plank is a safe, weight-bearing exercise for bone health. It builds strength without the risk of falling or jarring the joints.
Side Planks and Lateral Stability
Transition to side planks to challenge different planes. This targets the obliques and the quadratus lumborum. It is essential for lateral spine support. Stack your feet or stagger them for balance. Keep the hips high and steady.
Detail shoulder stacking for proper joint alignment. The elbow must be directly under the shoulder. This prevents joint strain during the exercise. Try mastering Mushti Mudra for emotional release and digestion to help with focus during difficult holds.
Mention the reverse plank for posterior strength. It focuses on the posterior chain and glutes. According to this Study on reverse planks and posture, this variation fixes forward-slumping shoulders. It effectively balances anterior core work.
Extended plank: move hands as far forward as possible from the push-up position to increase difficulty.
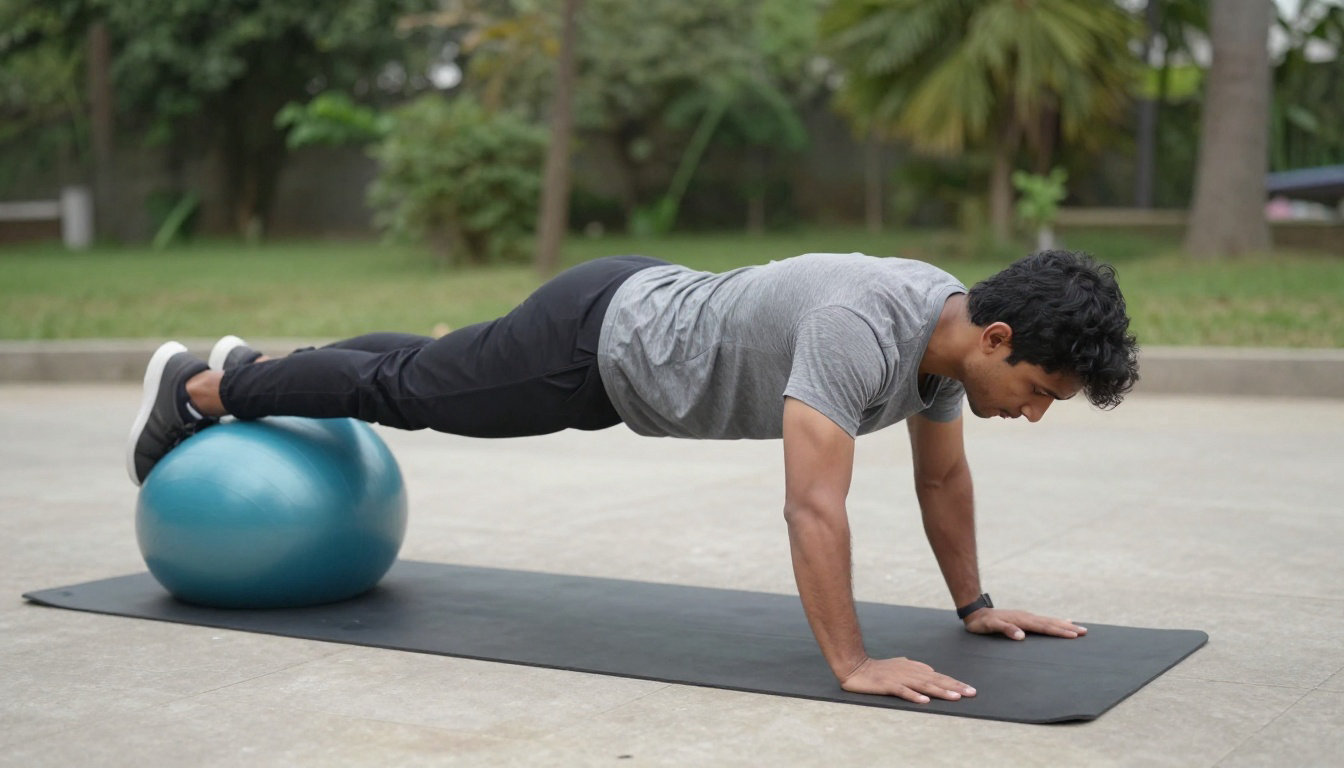
Training on Unstable Surfaces
Compare stable versus unstable surfaces for muscle recruitment. Using a stability ball increases the demand on the core. The body must work harder to stay still. This recruits more muscle fibers. It is an advanced training method.
Detail suspension trainers for a dynamic challenge. These allow for dynamic movements within the plank. You can pull your knees in or move your arms. This adds a level of complexity. It tests your coordination and strength.
Explain proprioceptive demand for elite performance. The brain must constantly adjust muscle tension. This improves overall balance and coordination. It is the ultimate test of core control for athletes. Stability becomes a reflexive habit.
Health Benefits and Long-Term Safety Protocols
Beyond muscle tone, the plank offers significant cardiovascular advantages and serves as a vital tool for long-term spinal health when practiced safely.
Cardiovascular Impact and Blood Pressure
Isometric holds like the plank significantly impact blood pressure management. Research suggests these static exercises help lower resting blood pressure effectively. They trigger blood vessels to relax immediately after the hold. This mechanism provides a unique vascular benefit.
Studies show varying cardiovascular responses depending on the technique used. Comparing continuous versus intermittent sets is vital for maintaining safety. You can find more details in this Study on cardiovascular responses to planking.
The vascular response follows a specific physiological pattern. Sustained muscle tension restricts blood flow for a short period. When you release, blood rushes back quickly. This process can improve the health of the arterial walls over time.
Planking With Pre-Existing Spinal Conditions
The plank is often safer than sit-ups for those with disc bulges. It remains a static movement that avoids repetitive spinal flexion. Consequently, it does not compress the discs repeatedly. However, you must maintain perfect form. Never let the back arch.
Holistic support can complement physical training for better overall results. Consider exploring Mudras for Diseases: Healing Body and Mind Through Your Hands. Always seek professional medical advice before starting a new routine.
Pregnancy requires specific modifications to ensure safety for the core. Diastasis recti demands a cautious approach to abdominal pressure. Avoid traditional planks if the belly “cones” or bulges. Use side planks or bird-dogs instead to stay safe.
Programming Rest and Recovery Intervals
Proper recovery intervals are necessary for long-term progress. Rest for 30 to 60 seconds between each set. This allows the nervous system to reset properly. It ensures the next set is just as high-quality. Don’t rush the process.
Training frequency should be balanced to avoid overtraining the core. Three to four times a week is usually enough. For general health and recovery tips, see Kerala Ayurveda for Erectile Dysfunction: Natural Remedies and Care.
Effective recovery involves a few simple steps to help the muscles repair. Following a structured cool-down can prevent excessive stiffness.
- Deep breathing for 1 minute
- Gentle child’s pose stretch
- Hydration with electrolytes
- 48 hours rest for sore muscles
Mastering the plank exercise builds essential spinal stability and full-body endurance by utilizing isometric tension across the deep core. To progress, consistently maintain a rigid line from head to heels while gradually increasing your hold duration. Start your journey toward a stronger, injury-resistant physique today by perfecting this foundational bridge.